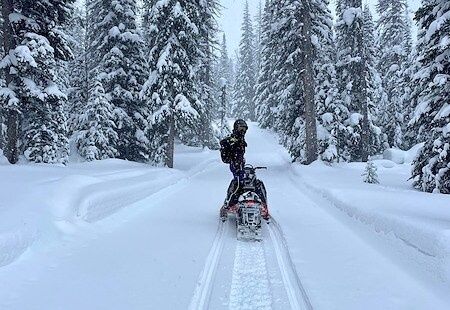
Snowmobile rider traveling through a snow-covered evergreen forest

Riding Lake Effect: How Topography and Storm Tracks Shape the Tug Hill Snowpack

Chasing the Greatest Snow Engine in the East

For winter riders, the Tug Hill Plateau has a reputation earned one squall at a time. This broad, elevated region of northern New York can turn a favorable Lake Ontario setup into a deep, fast-building snowpack, with trails disappearing beneath fresh powder while nearby communities remain under a much lighter snowfall. The result is a riding environment that feels both accessible and wild: maintained routes may be close at hand, yet visibility, wind, and depth can change dramatically within a short distance.

The engine behind that reputation is a rare combination of geography and atmosphere. Cold air arriving from Canada crosses the relatively warmer, open waters of Lake Ontario, gathers moisture, and organizes into narrow snow bands. When those bands reach the Tug Hill Plateau, the land rises abruptly from the lake plain to elevations above 2,000 feet. Air is forced upward, clouds intensify, and snowfall can accelerate over a concentrated part of the plateau.

As the 2026-2027 riding season approaches, that pattern remains the central planning issue for anyone seeking deep backcountry snow and reliable club trail access. A strong forecast can produce outstanding conditions, but the same storm can create whiteouts, buried trail markers, and difficult recovery conditions. Knowing how the snow engine works helps you choose the right departure window, machine, clothing system, and group plan before the throttle opens.

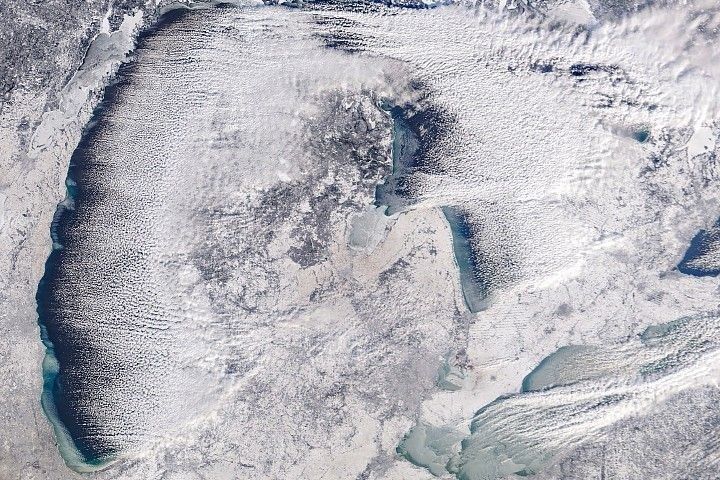
Satellite view of snow-covered land, ice, and dark water
Lake-effect snow can transform a favorable weather setup into rapidly changing trail conditions, making timing and preparation essential for Tug Hill riders.

Atmospheric Anatomy of Lake Effect Snow Bands

Lake-effect snow begins with a temperature contrast. Arctic or Canadian air moves over water that is warmer than the air above it, especially during the late fall and early winter period. Heat and moisture rise from the lake surface into the passing air mass. As that moisture-laden air cools, clouds develop and snow crystals grow. Under the right instability, the clouds organize into intense bands rather than producing evenly distributed snowfall.

The wind direction determines whether the lake can provide a long fetch, meaning a long stretch of open water over which the air can collect moisture and energy. A trajectory aligned with much of Lake Ontario gives the developing band more time to mature. Small changes in wind direction can then shift the band toward different parts of the shoreline and plateau. The basic process is explained in this overview of lake-effect snow, but riders experience the result in very practical terms: one trail system may receive several inches in an hour while a nearby road is merely wet or lightly covered.

That narrow focus is why radar awareness matters. A snow band can be only a few miles wide, with sharp edges between clear air and near-zero visibility. The Lake Effect Snow Event Archive maintained by the National Weather Service provides historic event information as well as links and references for Buffalo radar, Montague radar, snowfall reports, and upper-air products. Those tools help riders connect the forecast to what is actually happening over the plateau.

  • Long fetch: A favorable wind path across Lake Ontario increases the moisture available to the snow band.
  • Instability: A large difference between lake-water temperature and air temperature supports vigorous convection.
  • Band persistence: When wind direction remains steady, a narrow band can stall over one area for hours.
  • Sharp boundaries: Conditions can change quickly from manageable trail visibility to a full whiteout.

Before leaving, check the National Weather Service forecast discussion, radar loops, wind direction, and current observations rather than relying on a single snowfall number. Total accumulation is important, but the most immediate riding hazard may be snowfall rate and visibility. A storm delivering moderate snow over a long period may be easier to manage than a short-lived band producing several inches per hour directly across a ridge route.

Orographic Lift and the Tug Hill Geography

Tug Hill is not simply a snowy place because it sits near Lake Ontario. Its topography gives lake-effect snow an additional boost. The plateau rises sharply from the lower terrain near the lake to elevations exceeding 2,000 feet. That climb forces moving air upward. As the air rises, it expands and cools, encouraging condensation, cloud growth, and more efficient snowfall on the windward slopes and higher plateau.

This process is called orographic lift. A lake-effect band that is already carrying abundant moisture can become even more productive when it encounters steeply rising ground. The lift also helps explain why accumulation is uneven across a relatively small region. Windward communities and high terrain may receive a deep, rapidly refreshed snowpack, while locations outside the band or on the sheltered side of the plateau see much less.

Historic storms show how extreme the difference can become. During the November 19-20, 2022 lake-effect event, National Weather Service observers recorded 80 inches in Hamburg and Orchard Park, while Natural Bridge received 74 inches. Buffalo Airport recorded a substantially lower 36.6 inches in the updated totals reported by ABC7 New York. These numbers came from a major regional storm, but they also illustrate the larger lesson: lake-effect snowfall is highly localized, and elevation can magnify the outcome.

Feature Why it matters to riders
Lake Ontario fetch More open-water travel gives the air mass time to collect heat and moisture.
Sudden elevation gain Rising air cools and condenses, increasing snowfall over higher terrain.
Plateau exposure Open ridges can experience stronger wind, blowing snow, and reduced visibility.
Localized band placement Trail conditions may differ sharply between neighboring communities and routes.

For snowmobilers, the deepest snow is not automatically the easiest snow. Fresh powder can cushion the ride and cover roughness, but it can also hide drainage dips, fences, stumps, trail edges, and unmarked obstacles. In communities such as Montague and Natural Bridge, storm totals and elevation differences are useful reminders to adjust speed, spacing, and route choice whenever a major band settles over the plateau.

Navigating Shifting Snow Bands on the Trail

Radar is one of the most useful tools available to a modern riding group, provided it is interpreted with caution. Use a loop rather than a single radar image so that you can see whether a band is moving, weakening, or repeatedly redeveloping over the same area. Buffalo and Montague radar resources are particularly relevant to the Tug Hill region, but radar does not replace local observations. Snowfall can intensify between scans, and a radar beam may not show every detail near complex terrain.

Before departing, download maps and forecasts because cellular coverage may be inconsistent on remote club routes. During the ride, stop in a safe location before checking a phone. A sharp increase in wind, a gray wall on the horizon, snow streaming across the trail, or a sudden loss of contrast between trees and open ground can signal that a squall is approaching. On high ridges, visibility may deteriorate before the heavier accumulation reaches lower trail sections.

  • Slow down before entering a band instead of waiting until visibility has already collapsed.
  • Increase following distance and keep the lead sled in sight without riding directly in its snow dust.
  • Use marked trail junctions, GPS position, and known landmarks rather than guessing at intersections.
  • Turn around early if the group loses visual contact, fuel range, or confidence in the route.
  • Do not assume a nearby clear patch means the storm has ended, because lake-effect bands can redevelop quickly.

A stalled mega-band deserves a tactical response, not a contest of endurance. If radar and local reports show that the heaviest snow is parked over a particular ridge or corridor, consider delaying the start, choosing a lower-elevation route, or returning by the safest known trail. Club grooming and local reports can help identify passable corridors, but conditions may change faster than updates. Respect posted closures, private-property boundaries, and trail restrictions, and remember that a freshly covered route still requires conservative speed.

Machine Setup and Survival Gear for Deep Plateau Powder

Deep plateau snow places different demands on a sled than a firm, groomed trail. A longer track and deeper lugs generally improve flotation and traction in loose snow, while proper suspension setup helps prevent the machine from trenching. Engine calibration and clutching should match the machine, elevation range, and manufacturer guidance. Even though Tug Hill is not high mountain terrain, elevation changes and heavy snow can alter belt temperature, load, and throttle response.

Cooling also deserves attention. Powder can be deep enough to interfere with snow cooling systems, especially when the machine is working hard at low speed. Monitor temperature indicators and avoid prolonged operation when snow conditions are not allowing adequate cooling. Carry a belt appropriate for the sled, a belt-changing tool, spare plugs or manufacturer-recommended service items, and the knowledge to use them. A rental sled should be inspected before departure, with controls, lights, tether, reverse, fuel level, and emergency equipment confirmed during the orientation.

  1. Prepare the machine: Check track tension, ski alignment, fluid levels, lights, throttle, brake, tether, and reverse operation.
  2. Match the setup to the snow: Confirm track and suspension settings, clutching requirements, and cooling considerations with a qualified technician.
  3. Build a real emergency kit: Pack an insulated layer, dry gloves, face protection, food, water, first-aid supplies, fire-starting materials, flashlight, compact shovel, and basic repair tools.
  4. Plan communications: Share the route and expected return time, carry a charged phone in an insulated case, and consider a satellite messenger for areas beyond dependable cellular service.
  5. Use group discipline: Ride with a buddy, establish lead and sweep positions, and stop at every junction so the group remains together.

Cold-weather survival gear should be carried on the sled or on the rider, not left behind because the forecast looks favorable. Lake-effect storms can become more severe than expected, and a disabled machine can turn a comfortable trip into a prolonged exposure problem. Keep spare layers protected from snow, use goggles suited to flat light, and protect hands and feet before they become cold. If a breakdown occurs, stay with the machine unless there is a clear, known reason to move, because the sled is easier for rescuers to locate than a person traveling through a whiteout.

Communication protocols are just as important as equipment. Before the group leaves, identify the person responsible for weather monitoring, set check-in times, and agree on a turnaround rule. If a rider separates from the group, stop in a safe location and attempt contact rather than sending multiple people in different directions. A satellite messenger can provide a valuable backup where cellular coverage is unreliable, but it does not eliminate the need for route planning, batteries, and clear emergency information.

Prepare Your Sled for the Next Legendary Squall

Tug Hill rewards riders who respect the forces behind its snow. Lake Ontario supplies the moisture, the wind organizes it into narrow bands, and the plateau lifts those bands into some of the most intense snowfall in the East. That combination can deliver world-class powder and memorable trail conditions, but it can also produce whiteouts, rapid accumulation, and difficult navigation with little warning.

Monitor the forecast through the day, use radar intelligently, check local trail information, and choose a machine and gear package suited to deep snow. Ride at a pace that preserves visibility and group contact, give groomers and other users room, and leave the trail in a condition that supports the next rider. With sound preparation and disciplined judgment, the next major squall becomes more than a weather event. It becomes a chance to experience the Tug Hill snow engine at full power while riding with confidence.

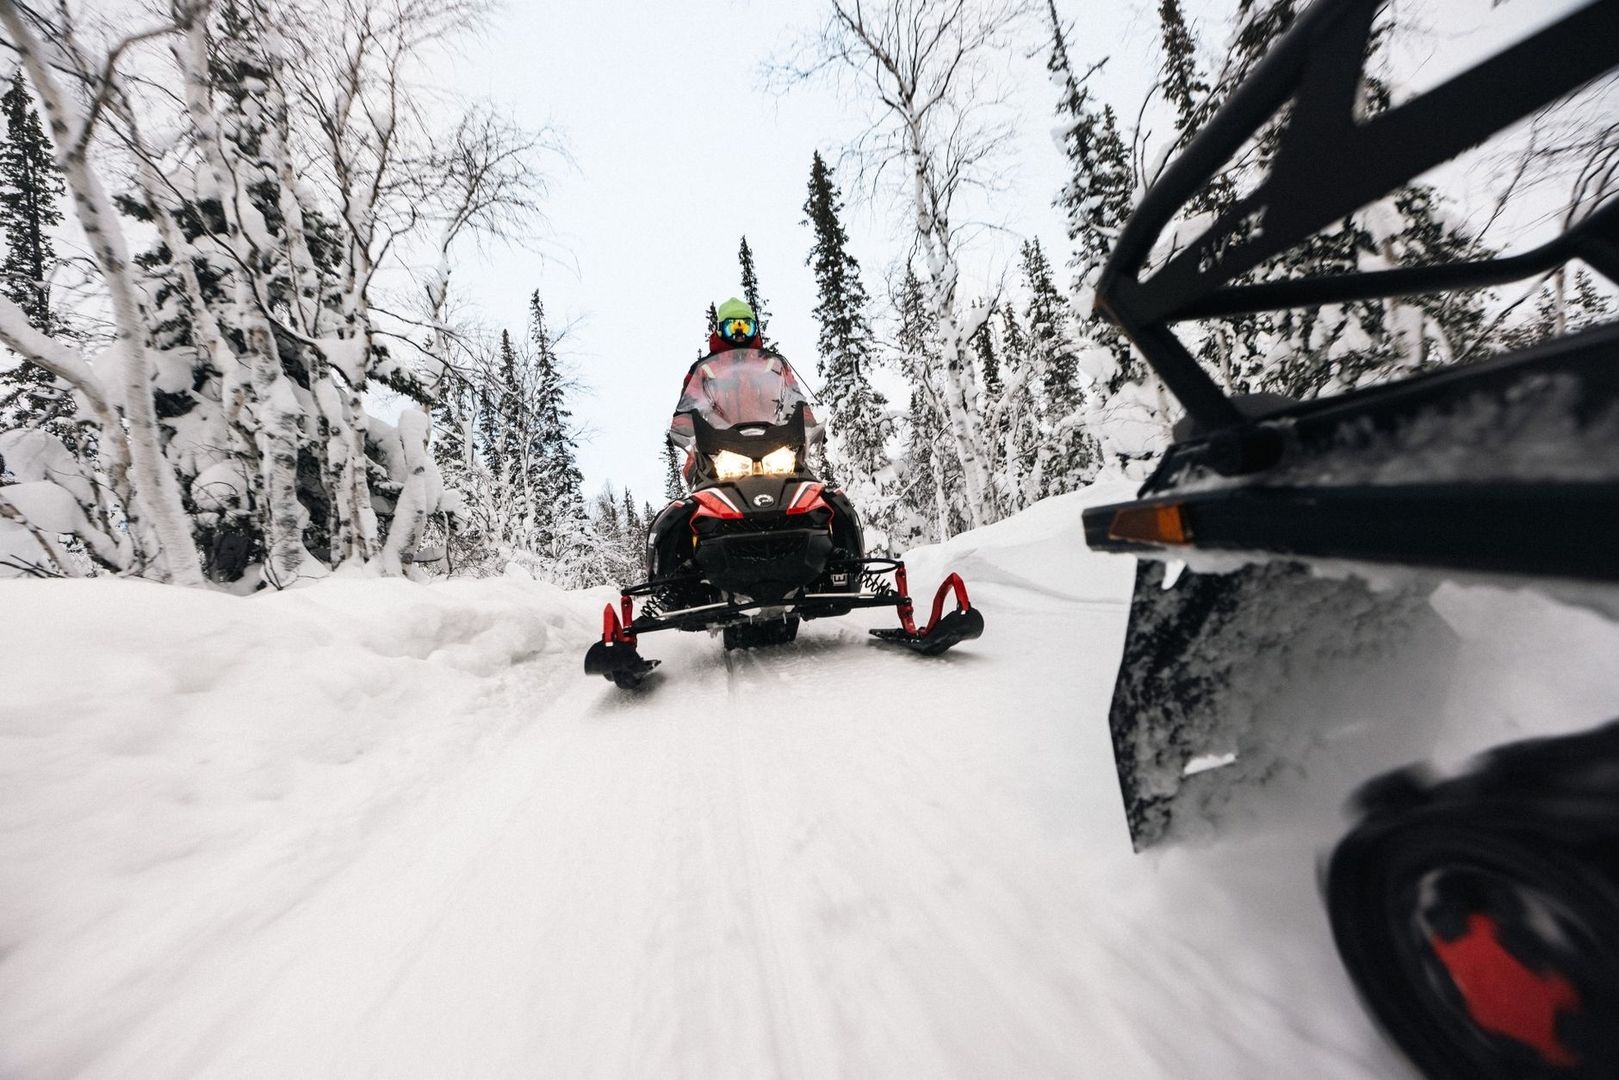
Snowmobile traveling through deep powder on a snowy forest trail

Reading the Snowpack: How Powder, Hardpack, and Wind Crust Alter Your Sled’s Physics

The Living Interface Beneath Your Skis

Snow is not a static surface waiting beneath your skis. It is an active crystalline medium that changes hour by hour as temperature, moisture, wind, sunlight, and pressure reshape the bonds between grains. Fresh flakes can create a deep, low-density layer that welcomes a track with gentle resistance. A few hours of wind can turn that same snow into a cohesive slab. An overnight freeze can lock moisture into a firm riding surface that demands accurate ski pressure and deliberate throttle control.

That changing interface is often mistaken for a chassis problem. A sled that feels heavy to steer may not need a new suspension setting; it may simply be working against dense, refrozen snow. A machine that darts or washes sideways may be reacting to carbide engagement on hardpack rather than a mechanical fault. To ride with confidence, connect snow science to the controls in your hands. Read the surface, predict how it will load the track and skis, then make smooth changes in body position, throttle, and steering before the terrain makes the decision for you.

Anatomy of the Snowpack from Flakes to Hardpack

New snow begins as precipitation particles with shapes determined by the atmosphere. Once on the ground, those particles continuously metamorphose. Temperature gradients can drive faceting, creating angular grains with weak bonds. More uniform temperatures encourage rounding, which generally produces stronger contact between grains. Wind can break and transport crystals, packing them into dense, cohesive layers on lee slopes. Melt-freeze cycles then alter the surface again, producing hard crust, icy patches, or a firm corn-like layer that may soften in direct sun.

Density matters because it determines how readily the snow deforms beneath the track. Unconsolidated powder offers low strength and allows the track to sink until enough snow is displaced to support the sled. Dense windboard resists initial penetration but may fracture abruptly when the load exceeds its strength. Hardpack provides little flotation but substantial support, allowing the skis and runners to transmit force directly into the surface. The result is a constantly changing balance between flotation, rolling resistance, ski bite, and side-to-side stability.

The avalanche safety glossary explains how faceting, sublimation, deposition, and melt-freeze processes transform snow layers. For riding purposes, the key lesson is that a visually smooth surface can conceal very different mechanical behavior. Use the following comparison as a practical field guide rather than a substitute for direct observation.

Snow condition Typical character Approximate density Effect on the sled
Fresh dry powder Loose crystals with weak bonding About 30 to 100 kg/m³ Strong flotation demand, high trenching risk, light ski bite
Settled powder Rounded grains with increasing cohesion About 100 to 250 kg/m³ More support and predictable resistance, but still dependent on track width
Wind slab or wind crust Dense, cohesive, sometimes brittle layer About 200 to 400 kg/m³ Initial support followed by sudden break-through or uneven loading
Hardpack or refrozen snow Firm, compacted, often abrasive surface About 350 to 550 kg/m³ Strong ski and carbide engagement, limited flotation, greater darting potential

Floating Through Bottomless Powder and Sinking Transitions

In deep powder, the track acts like a moving support platform. Its width, length, lug profile, and contact area determine how much pressure reaches the snow. A longer or wider track distributes the sled”s weight over more surface, while aggressive throttle increases the shear force that tries to excavate a trench. Once the track spins faster than the snow can support, it digs down, builds a berm behind the machine, and loses the momentum needed to climb onto the surface.

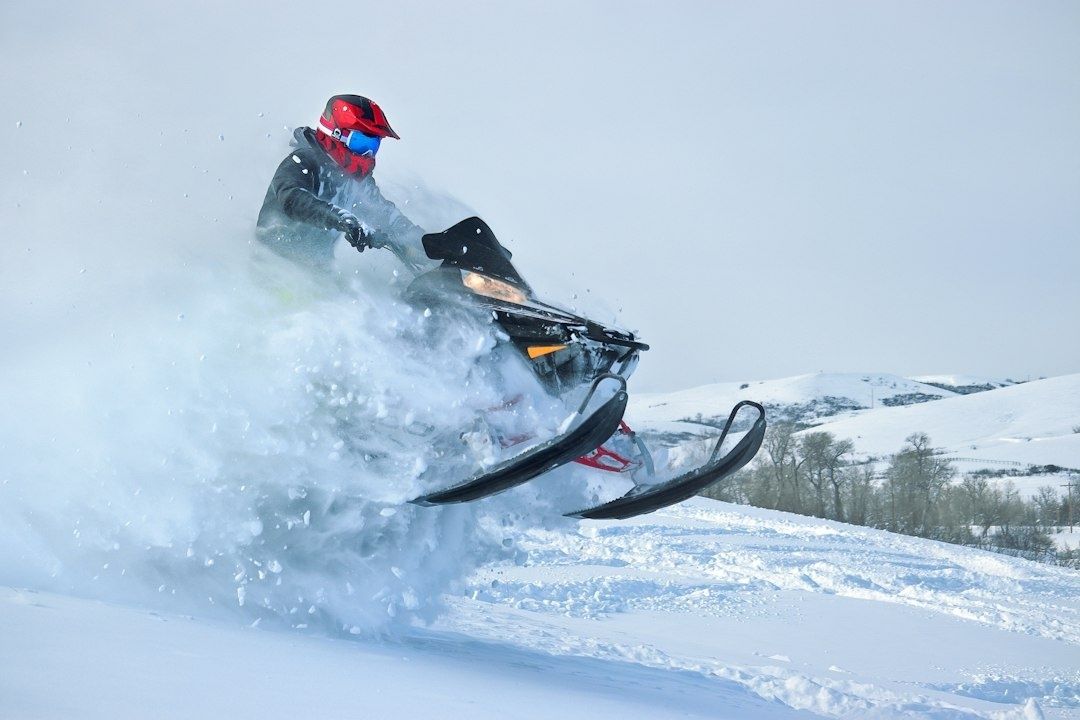
Conventional trail steering also becomes less effective because the skis are not working against a firm lateral platform. Turning the handlebars sharply can bury a ski rather than redirect the sled. Counter-steering, throttle management, and rider position become the primary control axes. A small change in lean can shift the track and ski loading enough to alter the sled”s direction, while a controlled increase in throttle can keep the machine moving across the top of the snow instead of sinking through it.

When navigating deep mountain terrain, mastering precise weight distribution and responsive throttle control allows riders to stay up on plane without trenching into unsupportive base layers. That principle applies to experienced backcountry riders and rental customers leaving a groomed trail for the first time. Smoothness is more valuable than force. Keep the engine pulling, avoid abrupt steering corrections, and let the chassis rise onto the snow before asking it to change direction.

Snowmobile rider traveling through deep powder on a snowy forest trail
In soft snow, a steady throttle and deliberate weight shift help the sled stay on top of the surface instead of trenching into it.
  • Keep your weight slightly forward when entering a soft pocket, then move rearward progressively if the skis begin to dive.
  • Use steady throttle instead of repeated bursts that create track spin and a deep trench.
  • In sidehill terrain, lean the upper body uphill while allowing the sled to remain aligned with the intended traverse.
  • Approach packed tracks at a shallow angle and reduce steering input as the skis climb onto firmer snow.
  • Check the snow ahead for texture changes, depressions, tree wells, and hidden hard layers before accelerating.

Taming Wind Crust and Breakable Slabs

Wind scouring removes loose snow from exposed ridges and transports it toward sheltered slopes. There, broken crystals can settle into a dense slab. The slab may feel supportive for several feet, then crack or collapse when the track, ski, or rider weight exceeds its strength. Sun crust behaves differently but creates a similar handling problem. A warm, moist surface freezes into a shell, while softer snow remains underneath. The sled may ride smoothly on top until one ski punches through, suddenly increasing resistance on that side.

A breakable crust can produce a sharp yaw or washout because the two skis are no longer experiencing equal support. One ski stays high on the slab while the other drops into softer snow. The handlebar may pull toward the sinking side, and the track can momentarily lose alignment as resistance changes. The safest response is usually a calm reduction in steering angle, stable throttle, and a deliberate body shift that keeps the machine from tipping into the unsupported side. Avoid sudden braking on an uneven slab, since weight transfer can make the front end more vulnerable to digging in.

Wind-loaded snow also deserves avalanche attention, not only handling attention. A hard surface may indicate a cohesive slab over weaker faceted or loose grains. The avalanche glossary describes persistent slabs and near-surface facets as problems that can be difficult to identify from the surface. Treat steep wind-loaded terrain with appropriate caution, use current local forecasts, travel with a capable group, and carry functional rescue equipment and training. Mechanical confidence never replaces terrain management.

  1. Scan for wind texture, scalloped drifts, smooth pillows, and abrupt changes from soft snow to firm board.
  2. Reduce speed before crossing the transition, keeping the sled straight and the throttle steady.
  3. Keep your elbows relaxed and allow small chassis movements instead of fighting every vibration.
  4. If a ski breaks through, shift smoothly toward the supported side, maintain enough momentum to avoid a stall, and straighten the machine.
  5. On steep or loaded slopes, stop and reassess the route rather than using throttle to force through an uncertain slab.

Mastering Ski Bite and Slide-Slip on Hardpack

Hardpack changes the sled”s physics from flotation to edge engagement. The carbide runner must penetrate a firm surface to generate lateral grip. When both skis bite evenly, the machine tracks cleanly through a turn. When one runner engages more aggressively, the sled can dart, pull, or demand heavy handlebar effort. Chassis roll also becomes more noticeable because the snow offers enough resistance to transmit steering and suspension forces directly into the rider.

Runner depth, ski pressure, alignment, suspension balance, and snow temperature all influence the result. More carbide generally increases bite, but maximum engagement is not automatically best. Deep runners can make steering tiring on a firm trail and may amplify darting if the skis are not balanced. Adjustable systems such as the Ski-Doo Pilot TS design allow the carbide to be extended for more grip or retracted to reduce bite and wear. Any adjustment must be made evenly on both skis, with the settings recorded so the sled remains predictable.

Before a hardpack trip, inspect runner wear, ski alignment, and suspension settings. If the trail is icy, begin with conservative speed and test braking and turning in a clear area. On steep refrozen sidehills, a controlled slide-slip can be safer than trying to force the skis to hold a perfect traverse. Keep the uphill side of the body active, maintain a consistent throttle, and use small steering corrections. A slide should be intentional, limited, and pointed toward a safe escape line, never allowed to develop into an uncontrolled downhill acceleration.

  • Use equal carbide settings on both skis and verify that the runners are not worn unevenly.
  • Reduce excessive ski pressure if the sled feels twitchy or darts across ruts.
  • Keep your eyes on the exit of the turn, not directly at the obstacle or rut you are trying to avoid.
  • Use the throttle to stabilize the chassis during a sidehill slide, while avoiding sudden acceleration that can break the track loose.
  • On icy descents, leave extra stopping distance and avoid abrupt handlebar inputs.

Sharpen Your Terrain Instincts on Every Mountain Mile

Reliable control begins with active visual reading. Watch for the matte texture of dry powder, the polished shine of refrozen snow, wind ripples, supportable slabs, and dark depressions where the track has already broken through. These details tell you how much resistance to expect before the skis arrive. As the surface changes, adjust your body position, steering pressure, and throttle continuously rather than waiting for the sled to react.

Daily freeze-thaw cycles and wind patterns turn a familiar route into a different mechanical puzzle each morning. A trail that was soft and forgiving yesterday may be firm and abrasive after an overnight freeze; a sheltered meadow may hold powder while an exposed ridge carries a brittle wind crust. Prepare for those changes with a machine check, suitable clothing, current terrain information, and a realistic pace for the least experienced rider in the group. When the snow is treated as a living surface rather than a uniform road, tricky terrain becomes more readable, more manageable, and far more rewarding.

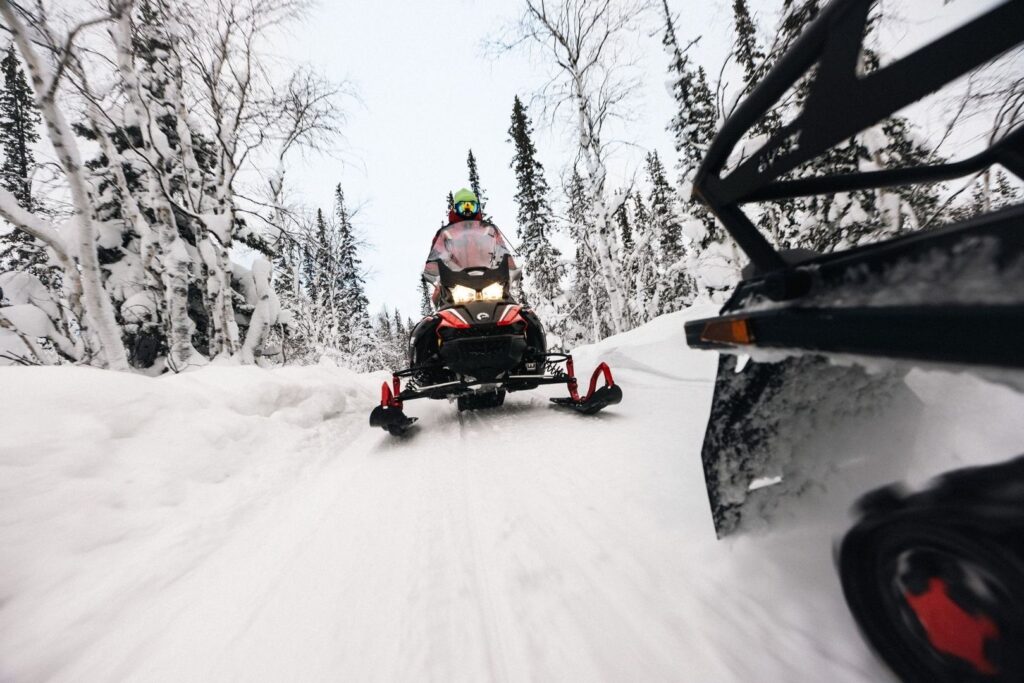
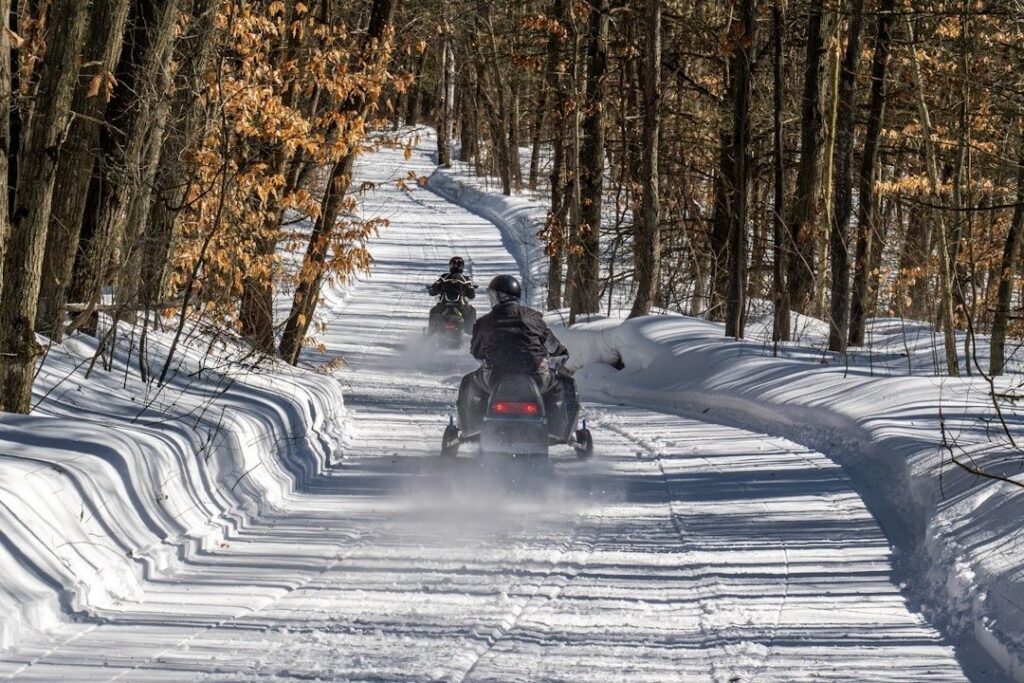
Two snowmobilers ride along a snow-covered forest trail

Trail Hand Signals: The Universal Protocol for Group Communication

Why Physical Communication Remains the Gold Standard on the Snow

On a clear afternoon, a Bluetooth headset can make group riding feel effortless. In sub-zero wilderness, however, electronic communication deserves a backup plan. Helmet batteries lose performance in severe cold, speakers can become difficult to hear beneath a windproof helmet, and pairing problems may appear at exactly the wrong moment. A rider may also be separated by terrain, engine noise, blowing snow, or a temporary loss of line of sight. That is why every organized group should understand snowmobile hand signals before leaving the staging area.

Hand signals create an immediate, battery-free visual language. The rider ahead can communicate a stop, a slowdown, a hazard, or the number of sleds still behind without shouting or reaching for a device. The golden rule is simple: execute signals with the left hand. The right hand stays on the throttle and handlebar so the machine remains under steady control, especially when decelerating. Signals only work when every rider uses the same vocabulary, passes the message to the person behind, and keeps enough spacing to see and react. Used correctly, this small discipline builds trust throughout the pack and helps oncoming traffic understand whether more sleds are approaching.

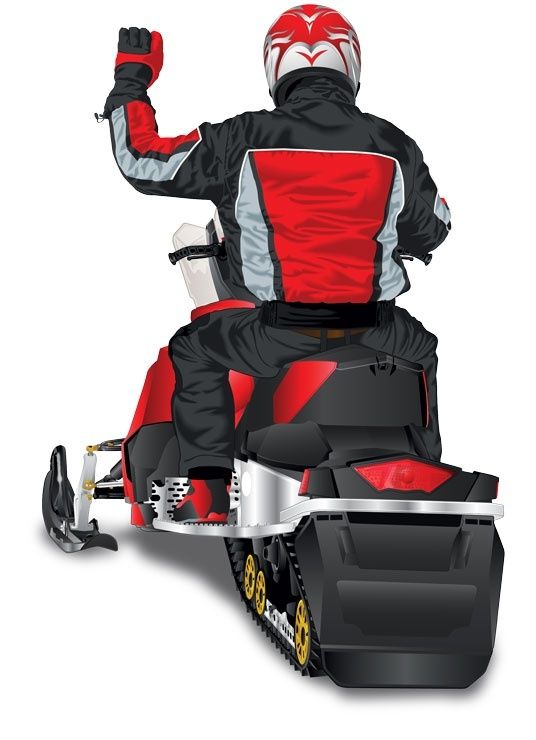
Rear view of a snowmobile rider raising a gloved hand
A shared hand-signal vocabulary keeps the group coordinated when cold, distance, and engine noise make electronic communication unreliable.

Mastering the Fundamental Machine Control Protocol

A snowmobile demands continuous input from the rider. The right hand manages throttle control, while both hands may be needed to absorb bumps, steer through ruts, or stabilize the sled on a packed corner. Keeping the right hand firmly in place allows smooth acceleration and controlled deceleration. It also prevents a rider from making an abrupt movement while trying to signal, a mistake that can unsettle the machine or surprise the person following.

All routine signals therefore belong to the left hand. Lift it only after confirming that the sled is stable, the terrain is manageable, and the following rider is likely to see the gesture. A signal should be clear and deliberate rather than rushed. If the trail becomes rough, narrow, steep, or fast, two hands on the bars take priority. A signal that compromises steering is not a safety signal at all.

  • Keep the right hand on the throttle and handlebar at all times during normal signaling.
  • Use the left hand for a short, visible gesture directed toward the rider behind.
  • Do not signal through a sharp corner, deep moguls, icy ruts, or a technical descent unless the machine is fully settled.
  • When visibility is poor, increase spacing and rely on slower group speed rather than assuming a gesture was seen.
  • If communication is urgent and a hand signal cannot be made safely, stop in a visible, protected location and communicate face to face.

Counting Sleds: The Lead Rider Communication Sequence

When the lead rider meets oncoming traffic, the group can use a finger count to show how many snowmobiles remain behind. The lead rider raises the left hand and displays the number of following sleds, from one through five when applicable. Each rider who receives the message reduces the count by one before passing it onward. This gives an approaching rider a quick estimate of how much traffic to expect around the next bend, crest, or narrow section.

For example, a lead rider with four machines behind raises four fingers. The second rider sees the four, then displays three to the oncoming snowmobiler. The third displays two, the fourth displays one, and the final rider shows a raised closed fist to indicate zero sleds remain behind. The sequence is not a replacement for slowing down or staying to the proper side of the trail. It is an added layer of information that helps riders make better decisions before meeting the rest of the group.

Message passed forward Gesture Meaning
Following sleds remain Raised fingers showing the current number Indicates how many riders are still behind
Count passed onward One fewer raised finger Each rider decrements the number before signaling
No riders remain Raised closed fist The final rider has passed and oncoming traffic can expect no more sleds from that group

Low visibility creates the greatest risk of misinterpretation. A glove may blend into a white background, a raised hand may be hidden by a windshield, and snow dust may shorten the viewing distance to only a few seconds. Hold the left hand beside the upper body rather than low beside the seat, keep the fingers fully separated, and avoid waving. High-contrast gloves are easier to read than pale gloves against a snowfield. If the number is unclear, the oncoming rider should treat the situation conservatively, slow down, and expect additional machines.

The Closed Fist: How the Sweep Rider Seals the Line

The sweep rider, sometimes called the tail gunner, has a critical communication role. After the final sled passes an oncoming rider, the sweep raises a closed left fist. This is the zero-followers signal. It tells oncoming traffic that the group has ended, reducing uncertainty at blind corners, bridge approaches, and narrow trail sections. Without that final confirmation, an oncoming snowmobiler may continue to wait or may enter a confined area while another member of the group is still approaching.

The sweep should not display the closed fist simply because the rider ahead disappeared from view. The signal means that no additional sled from the group is behind the sweep. If a rider has stopped with a mechanical issue, become separated, or turned back, the group must avoid sending a false all-clear. The sweep can remain with the disabled rider, while another designated rider informs the lead by radio or by returning carefully along the trail. A hazard light, headset, or direct communication may be useful in this situation, but every rider should still understand that a closed fist is reserved for a genuinely finished line.

  • Use the closed fist only when the rider is definitely last in the group.
  • Do not give the zero-followers signal if a rider is stopped, missing, or out of visual contact.
  • If a breakdown occurs, protect the stopped sled, account for every rider, and communicate the change in plan.
  • Oncoming traffic should still be met with proper lane position and reduced speed, even after the closed fist is shown.

Signaling Stops, Slowdowns, and Trail Hazards on the Fly

Stop and hazard signals require more than a familiar gesture. They require timing, spacing, and a group pace that gives every rider room to react. A rider who sees a signal should repeat it for the person behind, then begin reducing speed smoothly. Do not wait until the sled ahead is already stopped. The signal is an early warning, not permission to maintain speed until the last instant.

  1. Signal a full stop. Raise the left arm straight upward with an open palm. Keep the arm visible for the following rider, then ease off the throttle and brake in a controlled manner. Choose the safest stopping location available, away from the inside of a blind corner, the crest of a hill, or the center of a narrow crossing.
  2. Signal a slowdown. Hold the left arm down and move it in a slow, controlled pumping motion. The gesture tells following riders to reduce pace without necessarily stopping. Pass the signal along immediately, then create room for the rider behind to slow without locking the track or making an abrupt steering correction.
  3. Mark a hazard. Point downward with the left arm toward the danger on the trail side. Use this for washouts, exposed rocks, fallen limbs, icy patches, deep ruts, unexpected dips, or other obstructions. Point early enough that the following rider can identify the location, not merely the general direction.
  4. Manage a crossing. Reduce speed before a road, driveway, bridge, or trail junction. The lead rider should confirm the route and, where appropriate, wait on the opposite side so the group does not scatter or take the wrong branch. Continue signaling until the last rider has cleared the crossing.

Spacing is what turns a warning into usable reaction time. Following too closely leaves no room for braking, particularly on hard-packed snow where stopping distances can change quickly with temperature, traction, and machine weight. A rider should be able to see the sled ahead and still have enough open trail to stop if that sled suddenly slows. Increase the gap in darkness, snowfall, dust, unfamiliar terrain, or when riding behind a less experienced operator.

Ride with Confidence by Making Physical Signals Second Nature

Automatic muscle memory makes group riding calmer and more predictable. A rider who knows the signals does not need to pause and recall what an open palm, finger count, or closed fist means. The message moves down the line while the machine continues at a controlled pace. That consistency helps the lead rider manage the group, gives the sweep a dependable way to close the line, and provides oncoming traffic with useful information before the meeting point.

A short briefing at the staging area prevents confusion once helmets are closed and engines are running. Confirm the meaning of every gesture, decide who leads and who sweeps, review the expected spacing, and agree on what happens during a breakdown or separation. Keep the vocabulary simple and identical for the entire party.

  • Practice the stop, slowdown, hazard, following-sled count, and closed-fist signals before departure.
  • Confirm that every rider can see the gesture from a safe following distance.
  • Assign a lead rider and sweep rider based on experience, equipment, and familiarity with the route.
  • Agree on a regrouping plan for crossings, poor visibility, and mechanical problems.
  • Remember that steering and throttle control always outrank signaling when terrain becomes treacherous.

Hand signals are powerful because they are simple, visible, and independent of batteries. They are not a substitute for cautious speed, proper spacing, working lights, or sound judgment. When every rider uses the left hand, protects the right-hand controls, and passes each message clearly, the group can enjoy crisp air, packed trails, and changing winter terrain with far greater confidence.